App List
The application list is Trustable’s home screen. Everything you build lives here, and every action that operates on a whole application — open it, edit its environment, sync it with GitHub, publish it, remove it — starts from this page.
List application
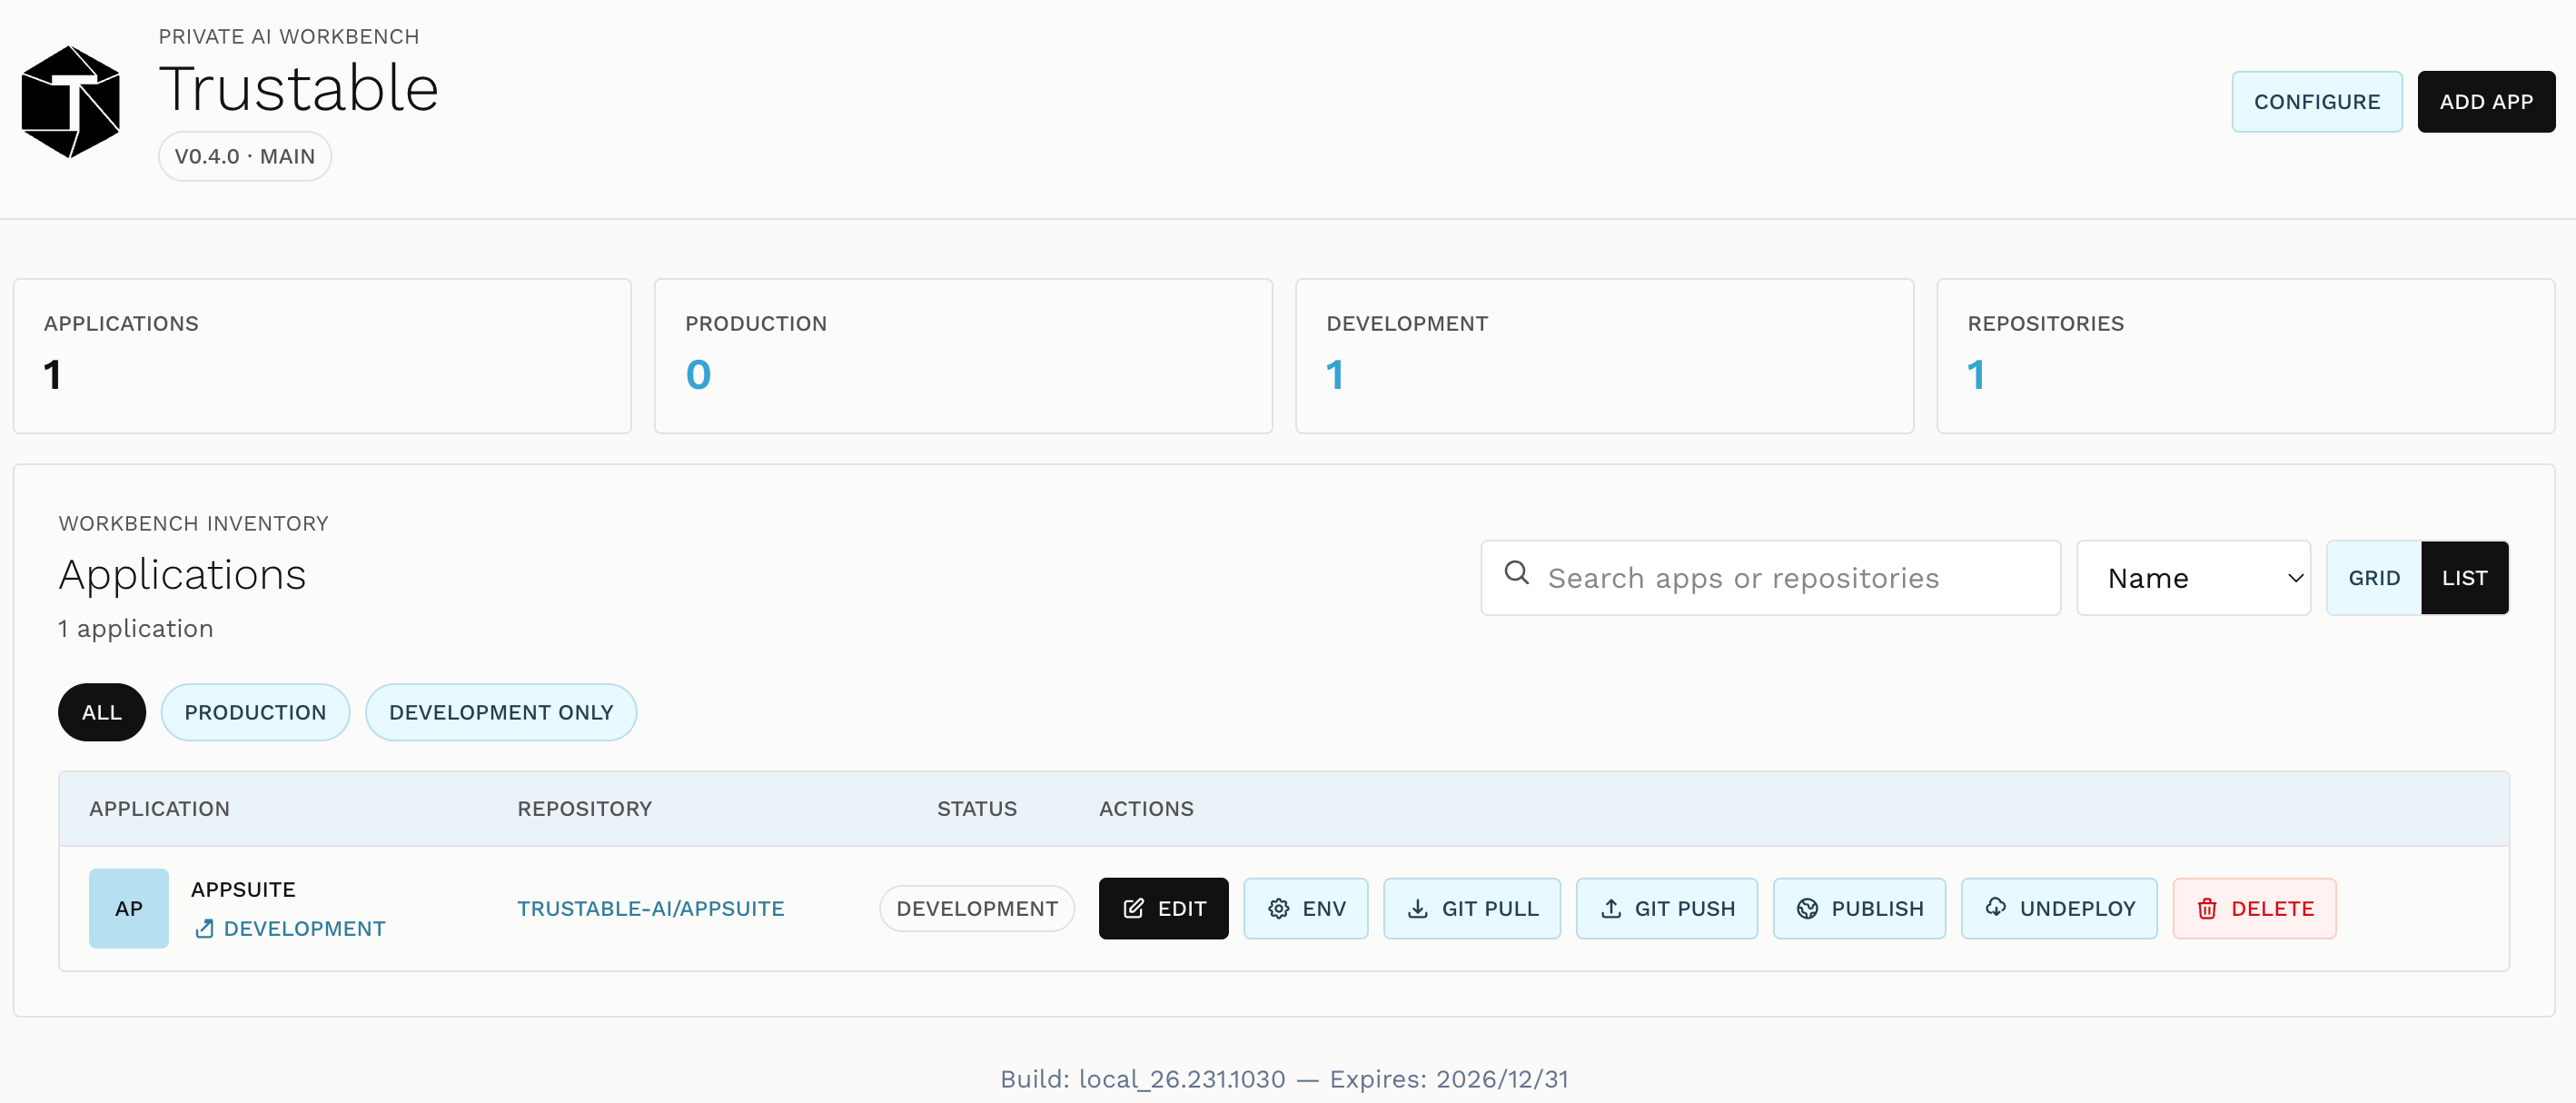
The page has four bands.
The header carries the Trustable logo, the product name, and a compact
release tag — V0.4.0 · MAIN above — giving the version and the build stream it
came from. Hovering it reveals the exact source branch and build label, which is
how you tell a local build from a development or release image. At the far right
sit the two global buttons, CONFIGURE and ADD APP.
The summary row counts four things at a glance:
- APPLICATIONS — how many you have in total.
- PRODUCTION — how many are configured for production, i.e. have a cluster to publish to.
- DEVELOPMENT — how many exist only locally so far.
- REPOSITORIES — how many have a Git repository behind them.
The Applications card — labelled WORKBENCH INVENTORY — is the list itself, with its search box, sort selector, view switch and filters. The count under the heading (“1 application”) always reflects what the current search and filter actually show.
The footer reports the build identifier and the expiry date of this Trustable version, plus a short hash identifying the ops task set in use. Trustable builds carry an expiry; past it, the app asks you to update.
When your provider is Sovereign AI, a Credits pill appears just under the title showing your remaining balance, refreshed every minute. With any other provider there are no credits to track and the pill is not shown.
Configure button
Opens the Configuration page — provider, models, license, Git identity and shared environment values. It is workbench-wide settings, not per-application ones; those live behind each row’s ENV button.
Add applications
ADD APP opens the Add Application dialog. There are two ways to get a new application, presented as tabs: start from a Starter — an empty but correctly wired skeleton you then describe to the AI — or pick a ready-made application from the catalog and adapt it.
Starter
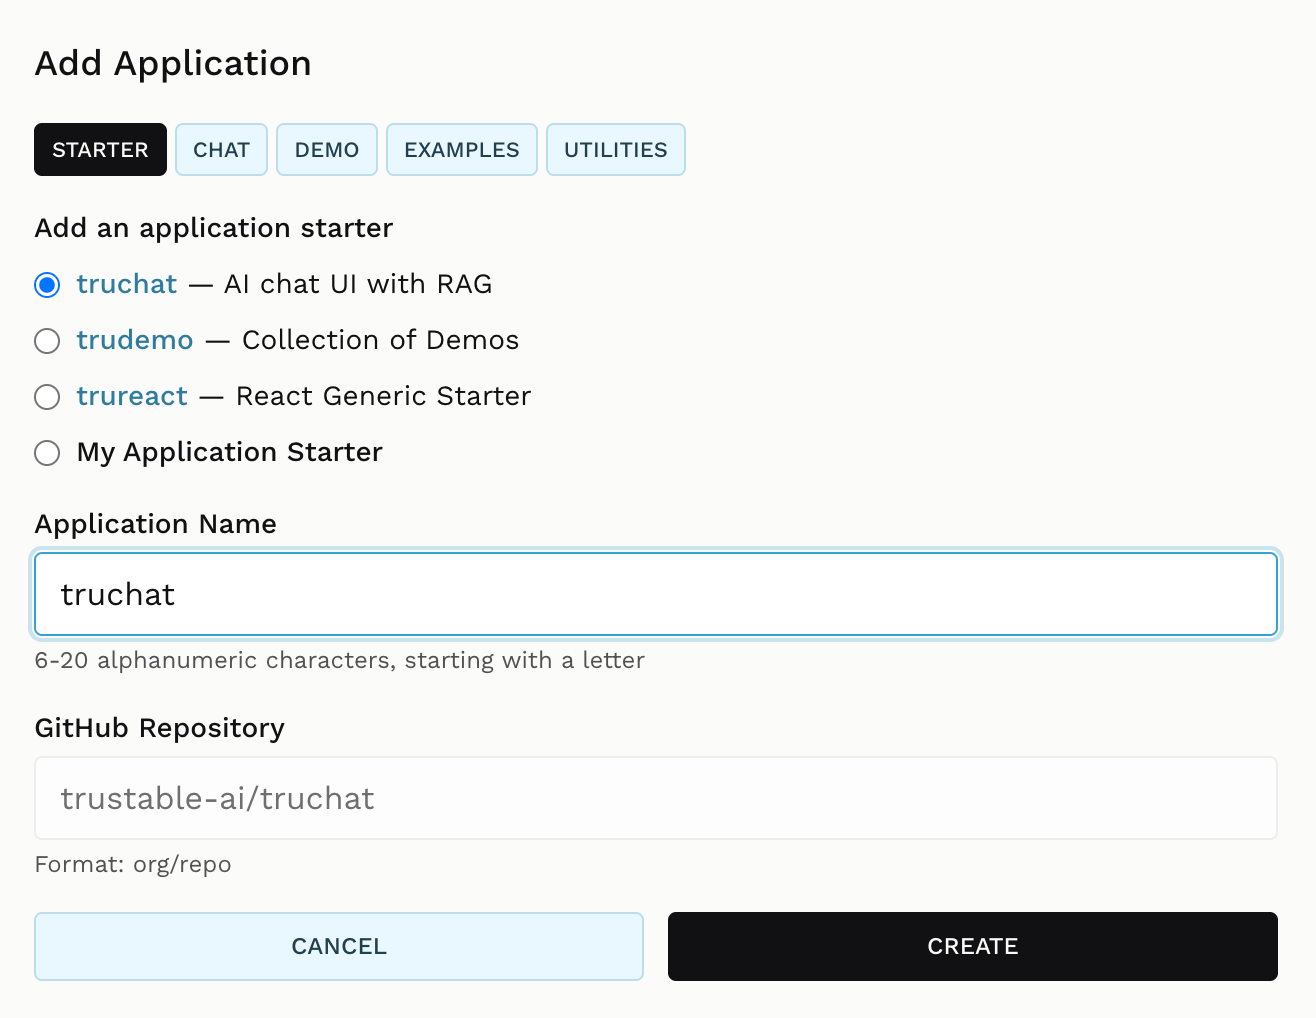
The STARTER tab is the default. It offers a short radio list of starters — minimal, convention-compatible repositories maintained for Trustable — each with its name as a link to its GitHub page and a one-line description:
- truchat — AI chat UI with RAG.
- trudemo — collection of demos.
- trureact — a generic React starter.
- My Application Starter — always the last row, for using a repository of your own rather than a published starter.
Below the list:
- Application Name — the name of the new application, and the identity it keeps everywhere: its repository, its workspace, its URL. It must be 6–20 alphanumeric characters starting with a letter, as the hint says, and it must not collide with an application you already have.
- GitHub Repository — in
org/repoform. It is prefilled from the starter you selected and is where the code comes from. Choosing My Application Starter is what makes this field yours to fill in; it is also the case where a private repository may need a connected GitHub account, so the dialog offers to connect one there.
CREATE creates the application: Trustable clones the starter into a durable repository of its own for this app, registers it, and returns you to the list. If the starter declares environment variables with no value, Trustable asks you to fill them in before going further.
Starters are discovered from a published index rather than by querying GitHub, so the list is identical on every installation. If it cannot be loaded, the dialog says so and leaves My Application Starter available, so you are never stuck.
Chat
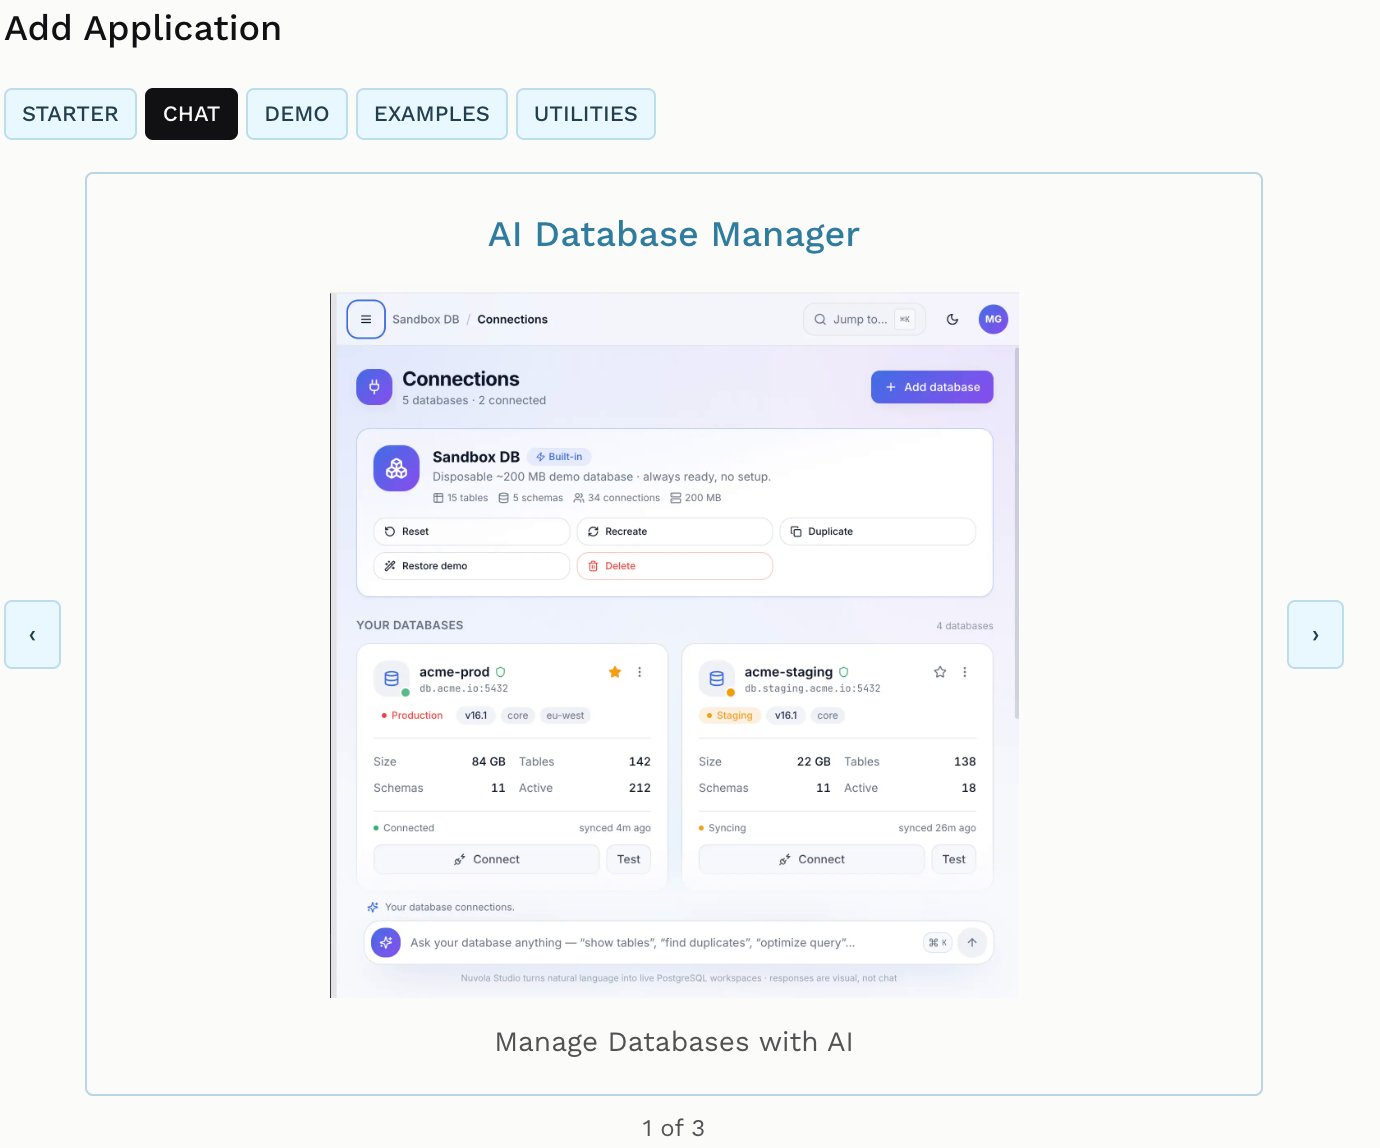
The remaining tabs — CHAT, DEMO, EXAMPLES, UTILITIES — browse the catalog of complete, working applications. Each tab is one group, shown as a carousel: one application at a time, with its title at the top linking to its GitHub repository, a screenshot in the middle, and its description underneath.
The ‹ and › arrows step through the group and wrap around at both ends; the arrow keys do the same. The “1 of 3” counter tells you how far along you are. A group holding a single application shows neither arrows nor counter.
The Chat group collects conversational applications — here AI Database Manager, an interface that turns plain-language questions into live PostgreSQL work.
Clicking anywhere on the card except the title link opens a small name panel:
it names the application and the repository it will be created from, prefills an
Application Name, and offers Cancel and Confirm. The prefilled name is only a
starting point — you can edit it freely, and if the obvious name is taken
Trustable appends the smallest free number (tetris, tetris1, tetris2).
Cancel returns to the carousel rather than closing the dialog, because you are
choosing, not aborting.
Demo
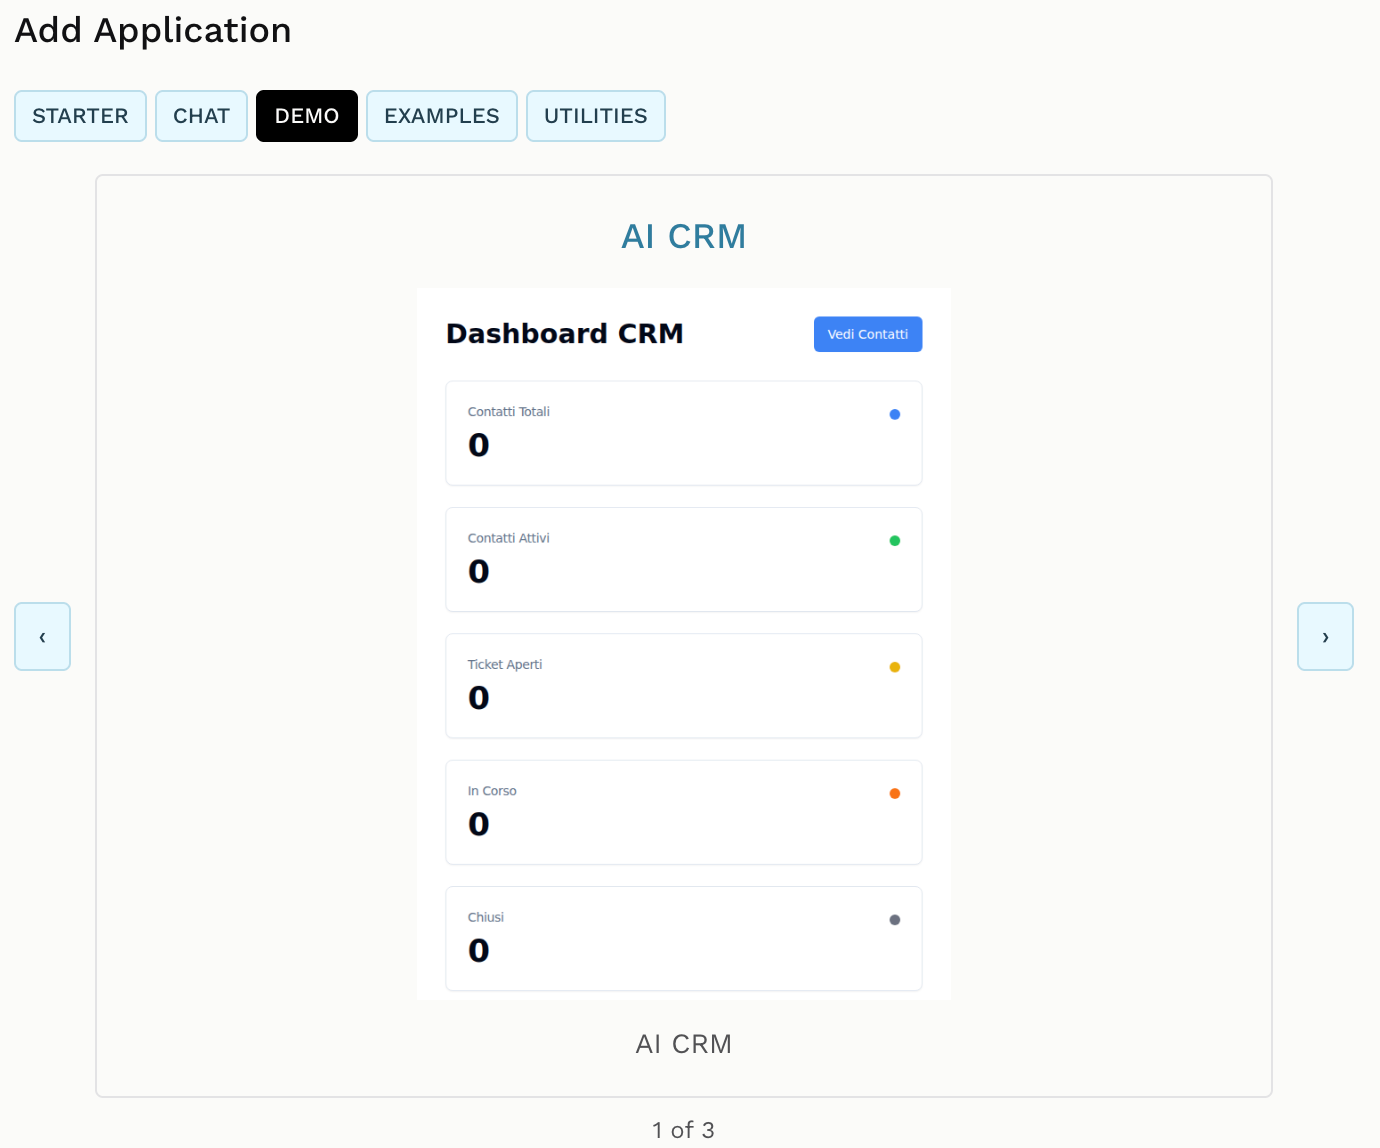
DEMO holds showcase applications demonstrating what Trustable can build — here AI CRM, a contact-and-ticket dashboard.
Examples
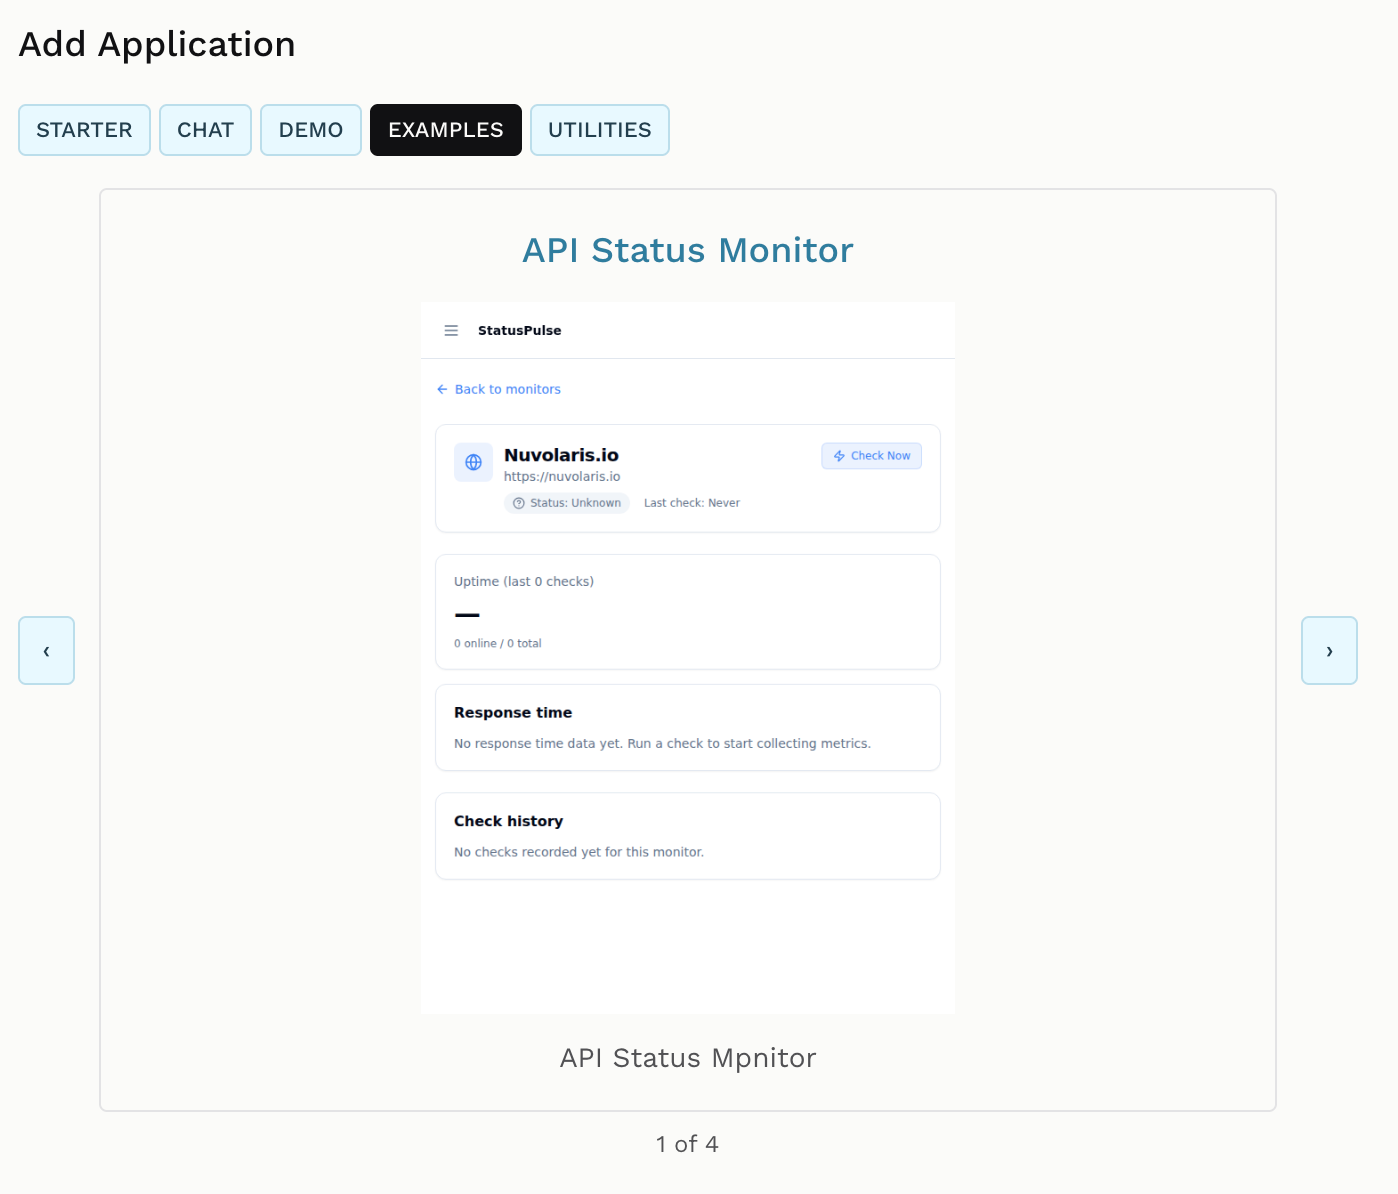
EXAMPLES holds worked examples you can learn from or build on — here API Status Monitor, which polls endpoints and records uptime, response times and check history.
Utilities
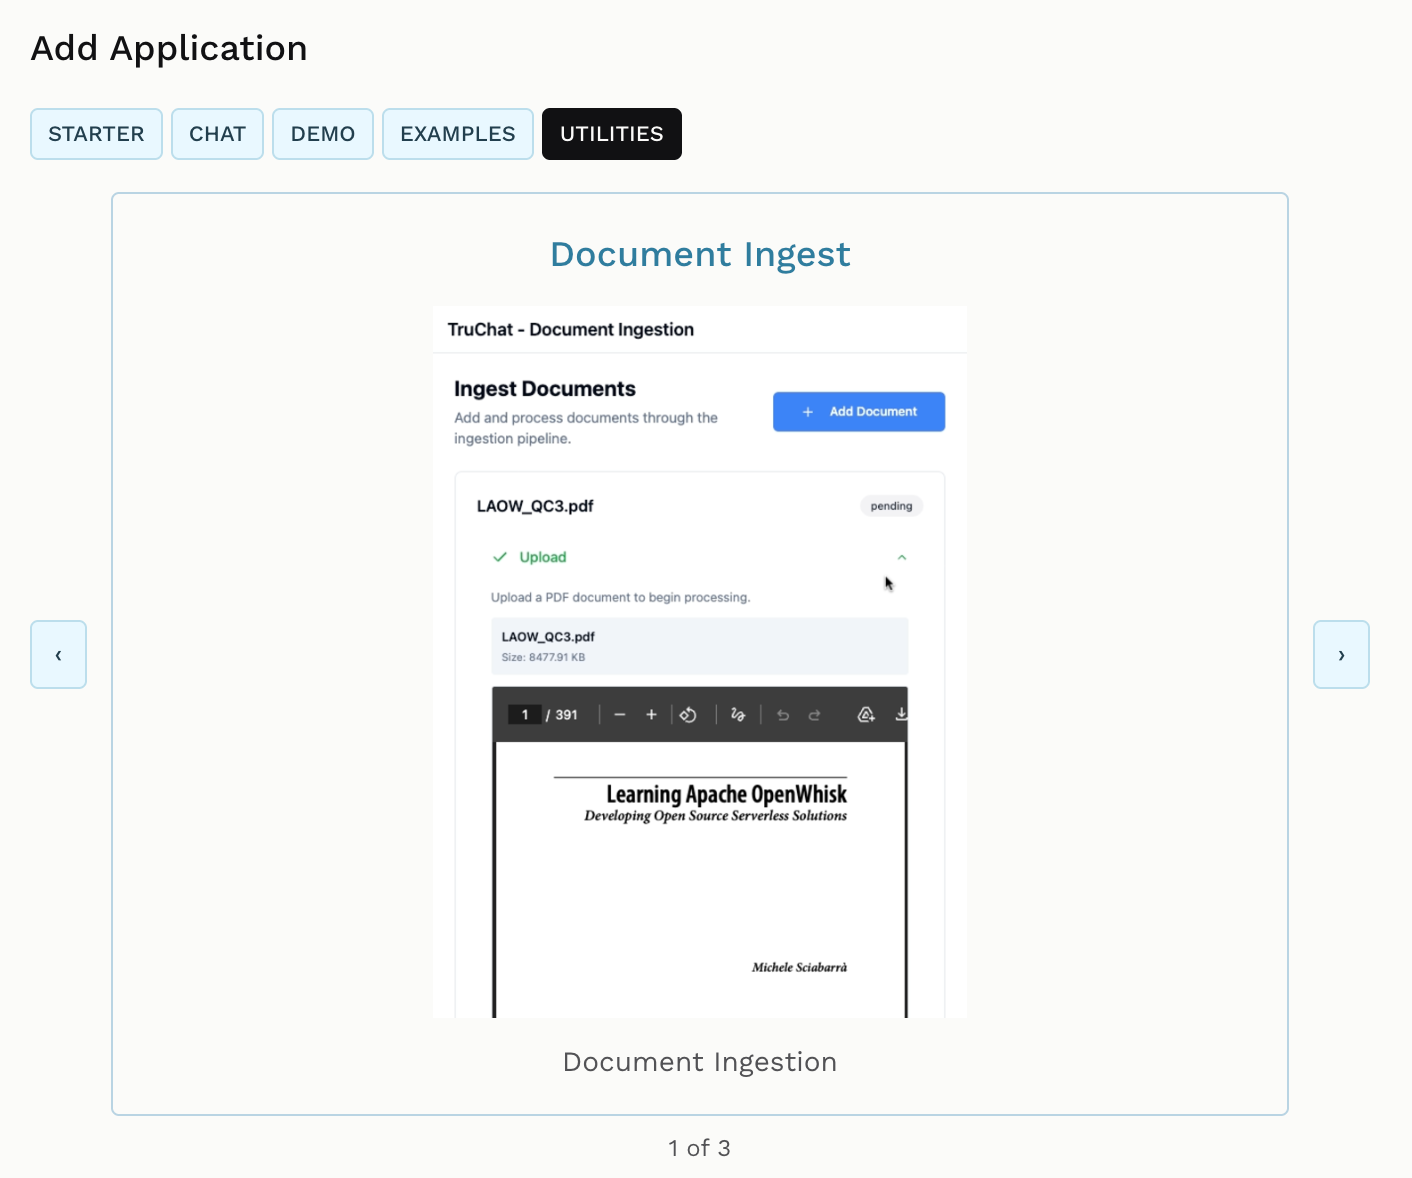
UTILITIES holds practical tools — here Document Ingest, which uploads PDFs and runs them through an ingestion pipeline so an AI application can search them.
An application can be listed under more than one group. Whichever tab you create it from, it is created from that entry’s own repository, so two entries in the same group give you two genuinely different applications.
Switching tabs never loses what you typed elsewhere: the Starter tab keeps its selection and name. Reopening the dialog always resets to Starter.
Application
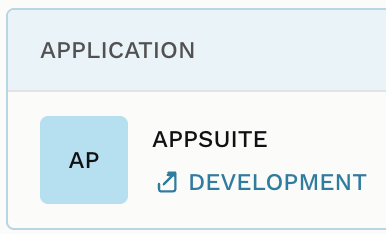
The APPLICATION column identifies each application: a colour-coded initials badge, the application name, and — when it is running — a DEVELOPMENT link that opens the live local application in a new tab. That link is how you look at what you are building outside the editor.
Filters
Three segmented filters restrict what the list shows. They combine with the search box, and the “N applications” count follows both.
All
ALL — the default. Every application, whatever its state.
Production
PRODUCTION — only applications configured for production, meaning they have a cluster host, user and credentials recorded and can be published.
Development only
DEVELOPMENT ONLY — the complement: applications that exist only locally and have never been given a production target. Useful for spotting work that is ready to ship but not yet configured.
Search

The controls above the filters:
- Search apps or repositories — filters as you type, entirely in the browser with no round trip to the server. It matches the application name, the repository, and the production host and user, so you can find an application by where it is deployed as well as by what it is called.
- Name — the sort selector; sort by application name or by repository.
- GRID / LIST — the view switch. LIST is the default dense table.
Grid
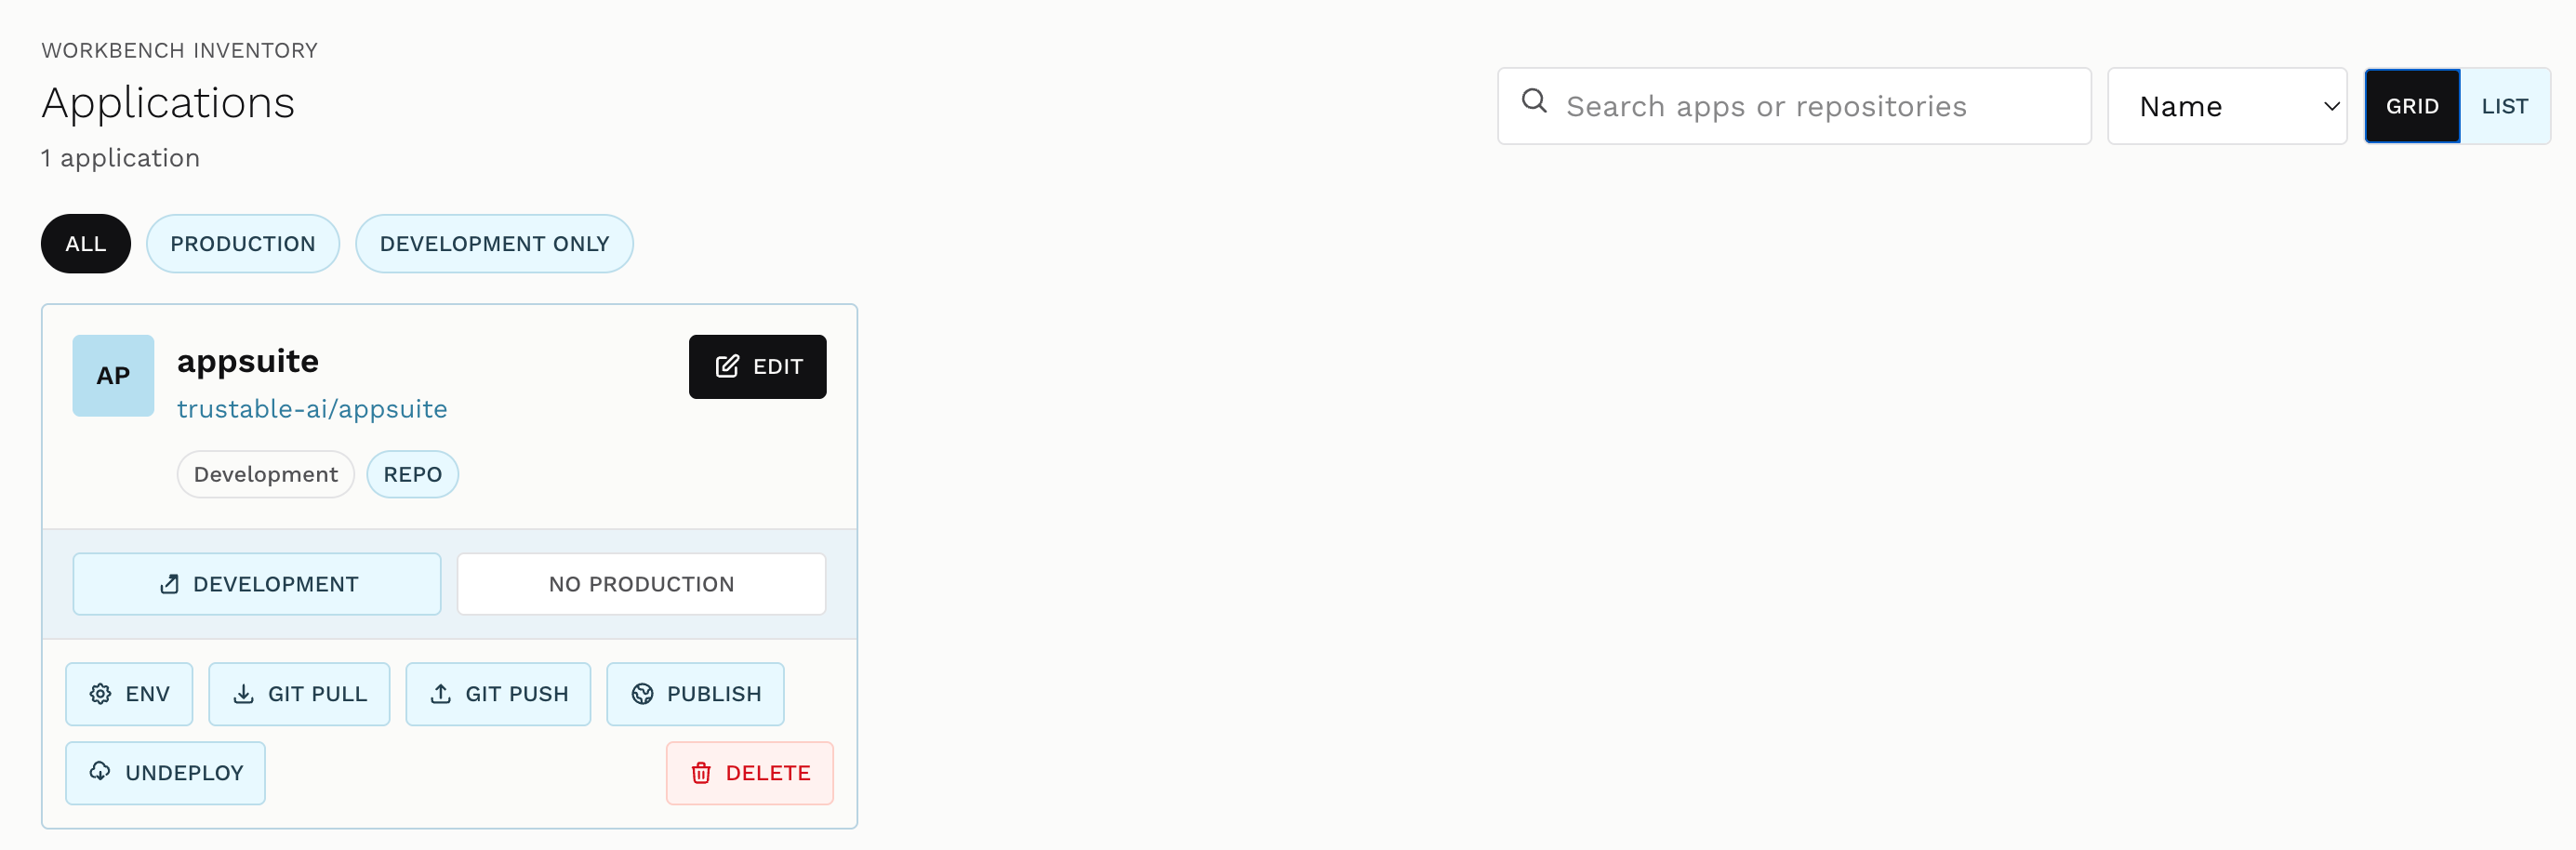
GRID shows each application as a card instead of a table row. The card carries the same information laid out vertically: the initials badge and name, the repository link, state chips (Development, REPO), then two wide buttons for the environments — DEVELOPMENT, which opens the running local application, and NO PRODUCTION, which is inert here and simply reports that this application has no published deployment yet. The actions sit at the bottom of the card.
Grid is the better view when applications have screenshots or you are scanning a handful of them; List is better once you have many.
Repository
The REPOSITORY column shows the GitHub repository backing the application, as
org/repo, linked to its GitHub page. This is the code’s public home — the target
of Git Pull and Git Push — as distinct from the durable local copy Trustable keeps
for itself.
Status
The STATUS column reports which of the two states the application is in: DEVELOPMENT when it exists only locally, PRODUCTION once it has been published to a cluster and is serving real users.
Action

The ACTIONS column carries every per-application operation. They are described one by one below, in the order they appear.
Edit

EDIT is the main one — it opens the application in the workbench editor, where you talk to the AI assistant and watch your application update live. See Editing.
Clicking it launches the application, which is real work: Trustable checks the code out into a working area, regenerates its configuration files, logs in to the cluster, installs dependencies and starts the development server. A progress bar tracks the actual lifecycle stages rather than a timer, so it reflects genuine progress; if a stage fails, the bar stops where it got to and the error is shown.
Clicking Edit again — from this tab or another — is safe. Trustable reuses a runtime that is already healthy instead of starting a second one.
Env
ENV opens the environment editor for this application: a table with a VARIABLE column and separate Development and Production values, so one application can point at a test database locally and the real one in production.
Four rows are fixed and cannot be removed:
- OPS_APIHOST — the cluster the application publishes to.
- OPS_USER and OPS_PASSWORD — its credentials on that cluster.
- OPS_REPO — its production repository, initialized from the Git origin.
For these, the development value is managed by Trustable and read-only; the production value is yours to set. Below them you add and remove your own variables freely.
Import .env and Import .env.production fill a column from a local file,
parsed in the browser. Neither import writes anything until you press Save,
which writes both files; Close warns you if changes are pending.
Values you keep in Predefined Environment Variables are offered here through a Use predefined values button when a required variable has no value. Nothing is copied in without you confirming it.
Git Pull
GIT PULL brings changes from GitHub into Trustable — work done elsewhere, by a teammate or by you on another machine.
It pulls from the configured production repository when there is one, and from the application’s original origin otherwise, then updates both Trustable’s durable copy and, if the application is checked out, the working copy.
The pull is deliberately conservative: it never merges, rebases, hard-resets or overwrites uncommitted work. If you have local changes or the histories have diverged, it stops and tells you, leaving your work untouched — commit or set your changes aside first, then pull again.
When the pull did change the checked-out copy, Trustable asks whether you want to deploy as well, since fresh code usually needs redeploying to take effect. Declining changes nothing.
Git Push
GIT PUSH sends your committed work to GitHub — the reverse of Git Pull.
The first push for an application needs a target, so Trustable asks for the
production repository in org/repo form. The same dialog offers to connect
your GitHub account, which is the recommended path: Trustable then pushes over
HTTPS using the connection, with no key to manage. If you would rather not connect
an account, a collapsed “Use an SSH deploy key instead” option reveals a key you
can add to the repository’s deploy keys with write access.
Once configured, the repository is remembered and later pushes go straight through.
Trustable pushes the repository’s own default branch rather than assuming main.
Git Push requires a valid license. Without one, Trustable offers to install a license rather than failing silently. See Configuration.
Publish
PUBLISH deploys the application to your OpenServerless cluster and moves it into the Production state, reachable at its own URL by real users.
The first publish asks for the cluster details — OPS_APIHOST, OPS_USER and OPS_PASSWORD — since Trustable cannot guess where you want it to run. The dialog notes that you need an OpenServerless environment, and points at info@nuvolaris.io or the OpenServerless project if you do not have one.
With the target known, Trustable prepares a clean checkout, generates the production environment files, logs in to the cluster in production mode, and deploys. Later publishes skip straight to the deployment.
Publish requires a valid license, and the license must cover the specific cluster host you are publishing to — a valid license for one cluster does not authorize another. Local development clusters are exempt from the host check but still need a valid license.
Undeploy
UNDEPLOY is the counterpart of Publish: it removes the application’s deployed actions and packages from the cluster, taking it out of production.
It is deliberately narrow. Your code, your local repository, your configuration and the application’s entry in this list are all untouched — only the running deployment goes away, and you can publish again at any time. Because of that narrowness it needs no license.
A confirmation modal asks “Undeploy <name>? This removes its deployed actions
and packages.” before anything happens, and the command output is shown when it
finishes.
Undeploy runs inside the application’s checked-out copy using cluster credentials, so an application that has never been opened has nothing to undeploy from: Trustable replies “workbench not found — launch the app first.”
Delete
DELETE removes the application from Trustable — its entry, its local repository and its checkout. It is styled in red because it is the only genuinely destructive action on this page and, unlike Undeploy, it does not leave the source behind.
Anything you have pushed to GitHub survives, since Delete acts on Trustable’s copy rather than on the remote repository. Anything you have not pushed is gone. If the work matters, Git Push before you delete.
Next
- Editing — what the EDIT button opens.
- Configuration — what CONFIGURE opens.